The following procedure was written by Curt Palme.
I’ve found that the CLR method for defungusing Sony tubes works really well,
and in most cases this will clear out all fungus and eliminates the need to
remove the front safety glass. This method takes about 15 minutes per tube.
Here’s how to do it:
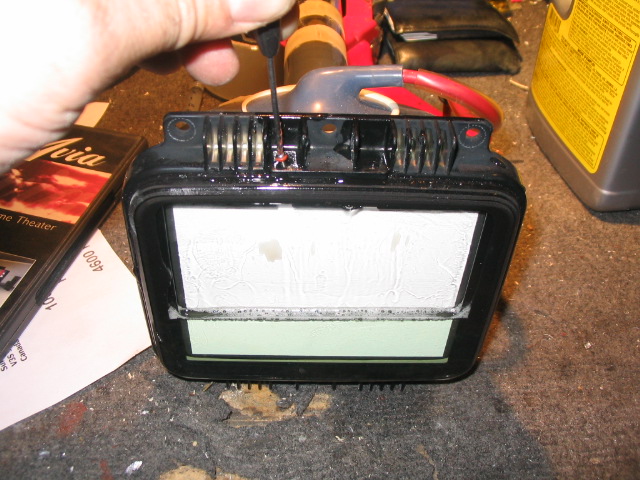
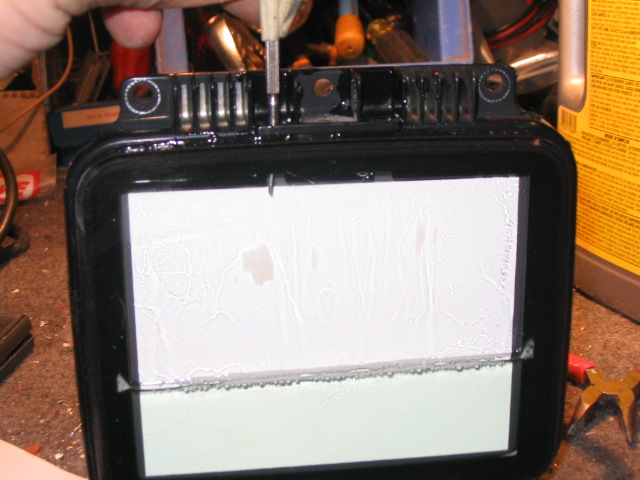
1) Remove the two small Philips screws on the top of the tube.

2) Take a small pin or jeweller's screwdriver and poke it into the holes
that the screws fit into. Usually the glycol crystallizes to some degree and
clogs the holes. Free them up.

3) Drain the glycol from the tube (you’ll need new glycol, available on the
net or from me). I use compressed air shot into one hole, which forces the
glycol out the other hole. Note that the glycol is toxic and does not evaporate.
Do not allow pets to lick it up! I drain the glycol into a large rubber garbage
can…
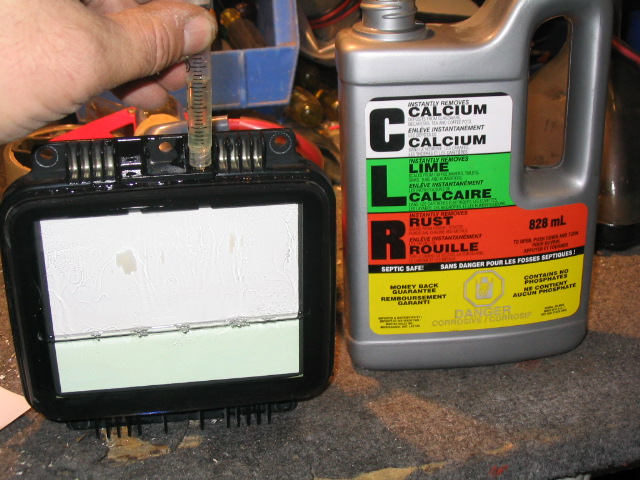
4) Once the glycol is drained, I use a syringe to insert CLR to about the ½
way point in the tube. The CLR is corrosive, so again, be careful. Put the tube
face down, and swish the CLR around the tube for about 5-10 minutes. All of the
fungus spots will be dissolved.

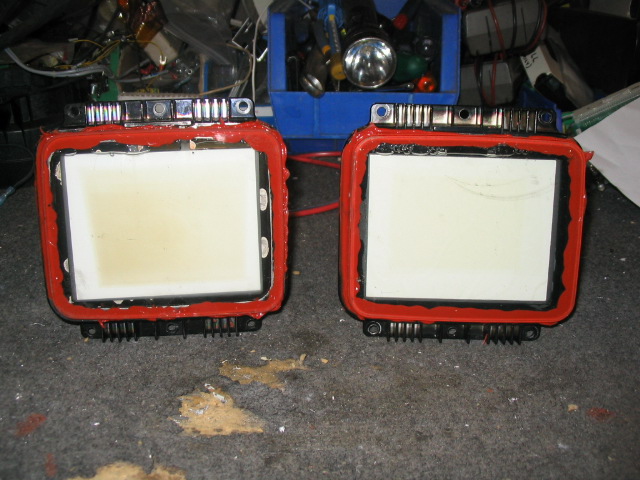
5) Drain the CLR from the tube, refill with fresh glycol, leave a small
air bubble at the top of the tube to allow for glycol expansion, and reinstall
the Philips screws. Keep the air bubbles right at the top of the tube, out of
the phosphor area as shown below. Too much air in the tube, and you’ll see
reflections below the screen area as light bounces off the edge of the bubble.
You’re done!

Possible theory: I am guessing that leaving a couple of CCs of CLR in the
tube might prevent fungus buildup in the future, but I have not proven this. Do
it at your own risk!
Secondary method to the 'CLR' approach to removing fungus from a tube:
This was sent to me by a CRT forum member. He told me that the CLR method
didn't quite remove all of the fungus in his tube, but the following did.
Disclaimer: I personally have not tried this method, but the procedure seems
sound...
- Remove two screws at top of front glass
plate
- Remove the glycol using syringe to push air
into the chamber and force fluid out (I use an air compressor and hold the
tube over a large garbage can to force the old glycol out, shooting glycol
gets messy!)
- Note that the "fungus" (crystals, whatever)
are on the tube side of the chamber; appears to be a thermal reaction with
the glycol die, making it stick to the phosphor-heated glass
- Fill the coolant chamber with rubbing
alcohol. shake it around and leave it in there for 15 minutes
- Empty chamber, fill it with soapy water
with oxygen-based bleach (Snowy or other brand). leave it there for an hour
use a very thin wire put through the holes in the chamber to help remove the
green grunge from the glass surface (something like a stiff 18 or 20 gauge
solid core wire will work)
- Fill/empty chamber maybe 3 times to get all
the soap out
- Fill the chamber with clear glycol, leave
it in for a few minutes to get as much of the water out of the chamber
- Empty chamber, refill it with new clean
glycol.
- Optional: Use clear glycol and add a bit of
blue and yellow laserjet printer ink to match the color. after you've put it
in the chamber, agitate chamber to make sure all the color is evened out.
- Replace tube and re-converge (usually very
minor)
| Did you find this information useful? Please consider making a
donation to help defray the cost of managing and hosting future
articles, tips, and documents. |
|
|
|
Or
purchase
from
Amazon.com
and a small percentage automatically
goes to support this site at no extra cost to you! Visit their
Blu-ray and
4K UHD
stores for sales.
Want to show off your
home theater? See our
Blu-ray Release List & Must-Have Titles. |
|

|
|

|


