 |
Tube/Raster Setup Information
|
(Page 3)
|
Page: 1 2
3
4
5 6 |
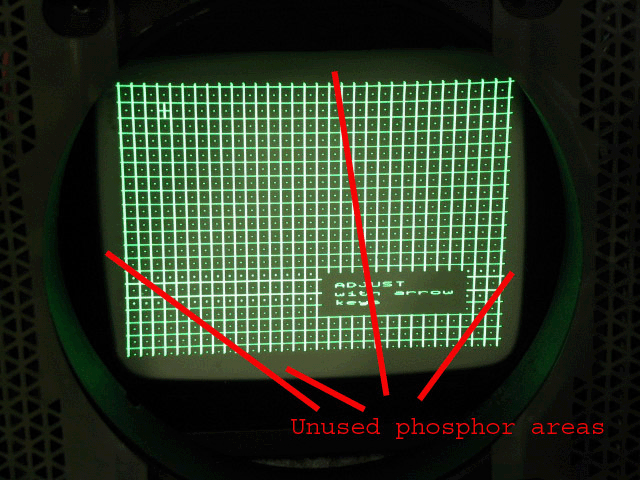
What you thus want to do is to use whatever means the projector gives you to
center the raster onto the tube face, so that there are equal areas of unused
phosphor at the edges of the tube. The below picture shows a good setup of the
raster projecting onto the phosphor. The maximum area of the phosphor is used
without overshooting the edges of the tube, resulting in maximum tube life. Note
that in 4:3 or 16:9 mode, you’ll run out of width first before you run out of
height on the tube face. This is normal.

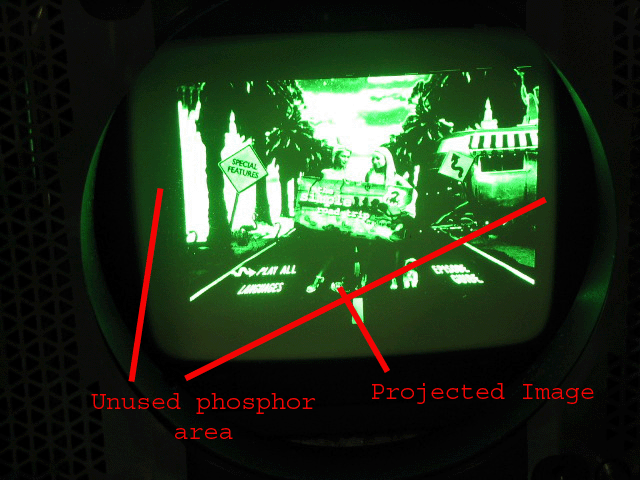
Now, it’s also normal for the test pattern of a projector to use slightly more
phosphor area than the actual projected image. When the test pattern is larger
than the projected image, this ensures that you will converge the projector
‘past’ the edges of the screen, thereby ensuring perfect convergence right to
the edge of the screen. The below picture shows a projected image that falls
within the raster area. Using the H phase control (these images were taken on a
Barco 808), you are now able to move the image within the raster area.


|
|


