 |
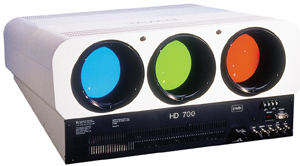
Dwin 500/700
Layout and Setup Tips
|
(Page 4)
|
Page:
1
2
3 4 |
The following additional Dwin HD700 pictures and notes were provided by forum member Gary
Fritz.
Thanks Gary!
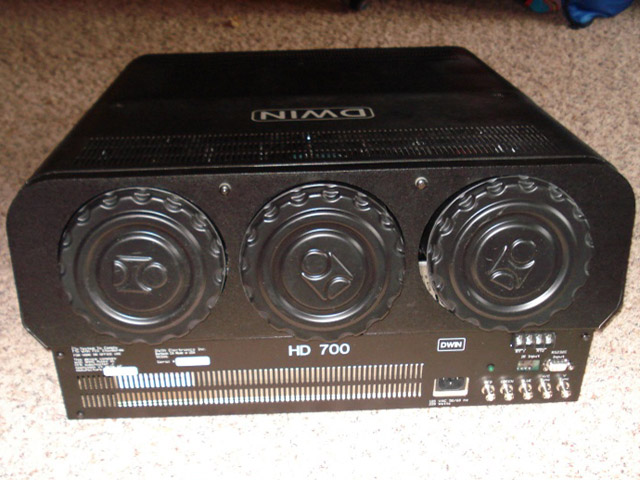
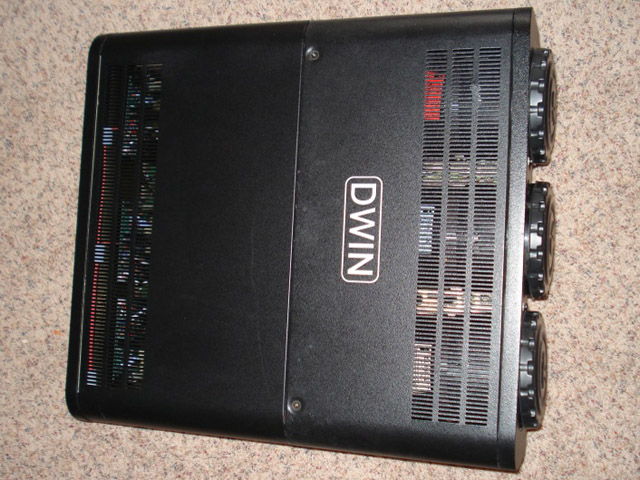
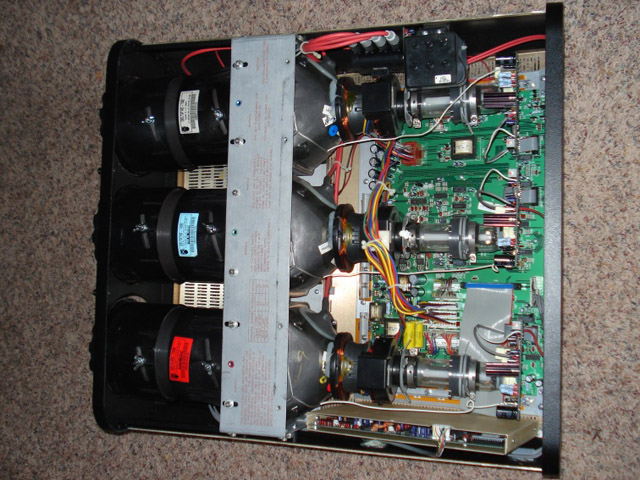
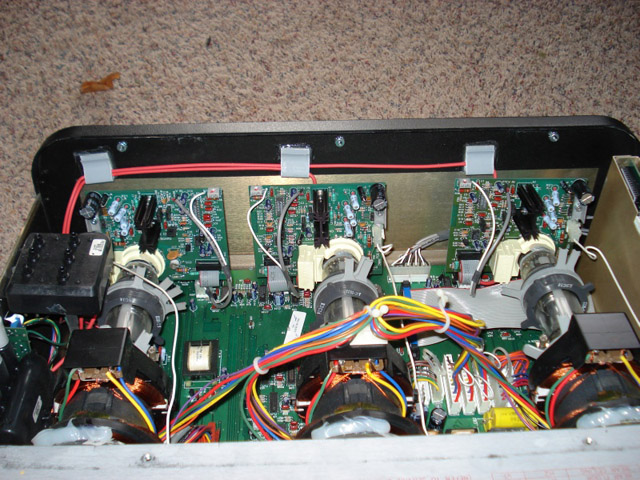
Some observations:
- The Dwin specs indicate that the HD700 has 1 small fan in the PS. Actually
it also has 2 belly fans! But it's still extremely quiet. With my
less-than-perfect hearing, it's hard to hear it more than 2-3' away.
- It's a bit longer than the 10.5x22x23.5" in the specs. By my measurement it's
11x22x25.5". Those measurements may be to the front of the case, whereas I
measured to the extreme front of the lenses. Their height measurement probably
doesn't include the feet.
- The specs say it's 65lbs. I don't own a scale, but FedEx says it shipped a
95lb package -- and it was packed in a cardboard box with foam, and a ceiling
mount. There's no way the box & mount weigh 30lbs.
- The design is very compact (no surprise). The power supplies are tucked under
the lenses. There's a main-board under the CRTs, the neck-boards, some board
inside a metal case next to the red, an HV distribution point next to the blue,
and that's about it.
- The HD700 comes stock with HD145 lenses, but
it can be upgraded with
HD145N color-filtered lenses (the one in the photos above has been upgraded).
- The lenses are held on by fixed bolts and
8mm nuts. It's a tight squeeze to get an 8mm socket into the channel along
the backs of the lenses where the nuts are; those channels are really
intended for a screwdriver shaft. There's not enough room between the lenses
and (non-removable) front bezel to slip in a 1/4" socket extension, so you
have to approach it from the sides of the lenses. You can remove the top two
nuts on each lens with a short socket driver, but it's nearly impossible to
get at the bottom two nuts. There's not enough room between the lenses to
squeeze your hand in there. The best approach seems to be to remove the
front panel and pull out the power supply, thus giving access to the lower
nuts. A socket extension will help. However, even once you have unbolted the
lenses, it is nearly impossible to work them out of the space between the
bezel and the CRTs. Don't bother pulling the lenses unless you REALLY need
to.
- The manual is pretty pathetic.
- The manual doesn't say much of anything about magnetic setup, but it appears
to be a 4-pole system -- 4 tabs at the end of the neck, and 2 more (presumably
centering) toward the bell.
- I wouldn't recommend hanging this thing by the foot-bolt holes, like you can
with an NEC XG (and some other models). The front feet hook into some very thin
sheet metal, which is further weakened by ventilation holes around the feet. The
nut on the other side of the metal is apparently welded (badly) onto the sheet
metal; one of mine is broken off so the foot is loose. The rear feet seem to be
just screwed into the base. I don't think you could replace them with a hanging
bolt, but I haven't tried to remove them to be sure.
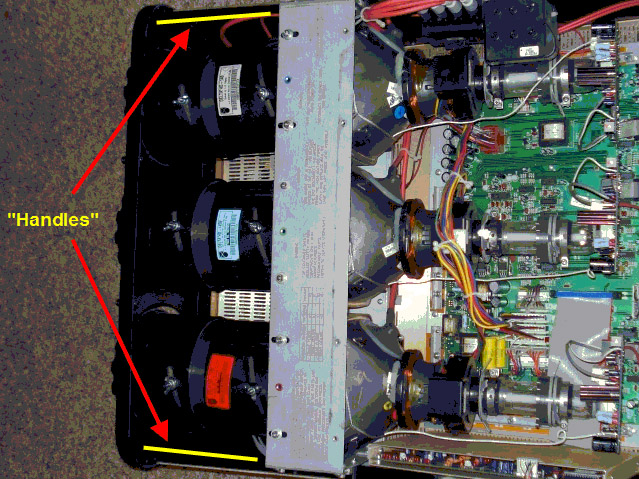
- The carrying "handles" are INSIDE the chassis! You have to remove the top
panel to get at them. Not nearly as nice as, say, the handles on a NEC XG (or
Sony G90), and they're not even at the center of balance - but it does give you
something to hang onto.
| Did you find this information useful? Please consider making a
donation to help defray the cost of managing and hosting future
articles, tips, and documents. |
|
|
|
Or
purchase
from
Amazon.com
and a small percentage automatically
goes to support this site at no extra cost to you! Visit their
Blu-ray and
4K UHD
stores for sales.
Want to show off your
home theater? See our
Blu-ray Release List & Must-Have Titles. |
|

|
|

|
|


