 |
||||||||||||
| Home |
|
Products For Sale |
FAQs, Tips, Manuals |
Referral List |
|
Photo Gallery |
|
Links |
|
Contact Us |
|
|
|||||||||||||||||||||||||
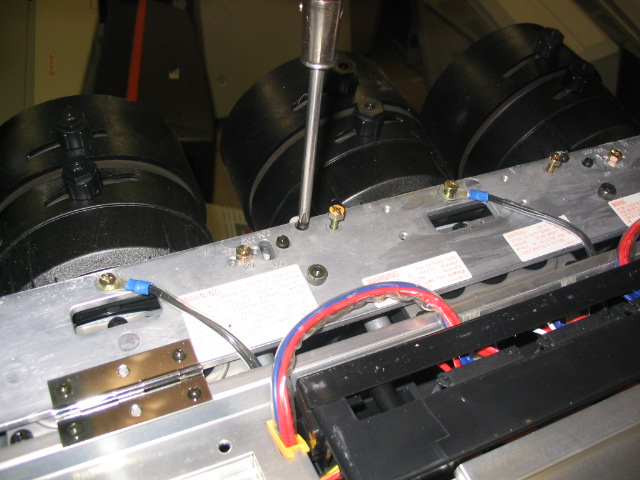
Removing tubes: Swapping out tubes in the G70 is quite easy. Here’s how to remove the tube assembly. (whether you choose to remove the tube with the yokes and other hardware on it, or if you choose to slide the hardware off the neck of the tube while pulling it out of the set is up to you). Remove the two brass screws that hole the tube of the tube in place, and remove the center screw of the tube that has the black ground wire screwed under it as shown. Loosen but don’t remove the long black shafts that hold the bottom of the tube in place.
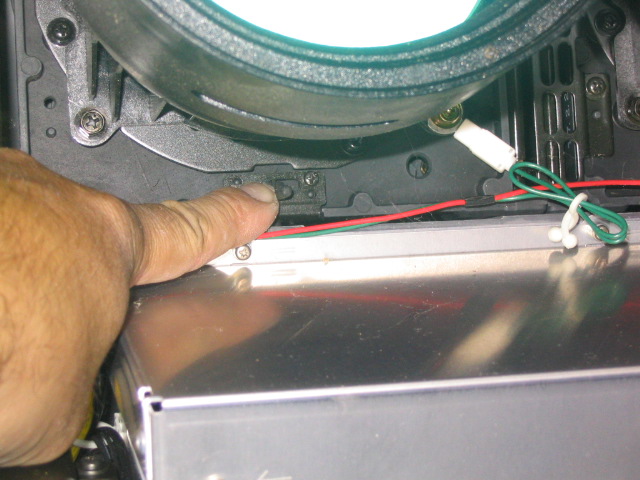
There is a small slide lever under each tube assembly as shown below that locks the bottom of the tube in place. Slide this lever towards the lens and push it sideways to lock it out of the way:
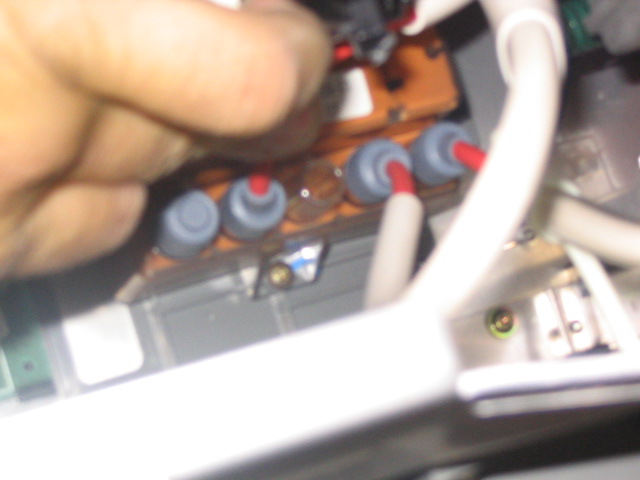
Disconnect the red HV lead from the HV splitter by pulling back the gray rubber boot covering the lead, then push down hard on the red HV lead going into the block, rotate 90 degrees CCW, and the HV lead should slide right out of the HV splitter. If the red lead doesn’t come loose, try pushing down hard on the lead and twisting again. There are two tiny metal tabs at the tip of each HV lead that need to unlock from the splitter block before the lead will come out. Forcing the lead will most likely snap the metal tip off in the block, and that’s then very difficult to remove from the block:
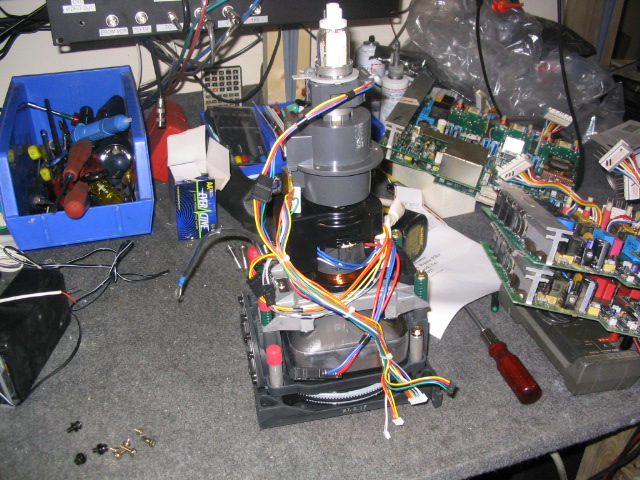
The tube will then slide out of the front of the set. Here’s a picture of the removed tube with all of the yokes and hardware still in place:
|
|
||||||||||||||||||||||||
© Copyright CurtPalme.com. All Rights Reserved. |

 Sony G70


