10.j Once you have a complete smooth layer of silicone on the mounting
surface, place some blocks under the housing face so that the mounting surface
is level. (Picture 10.j)
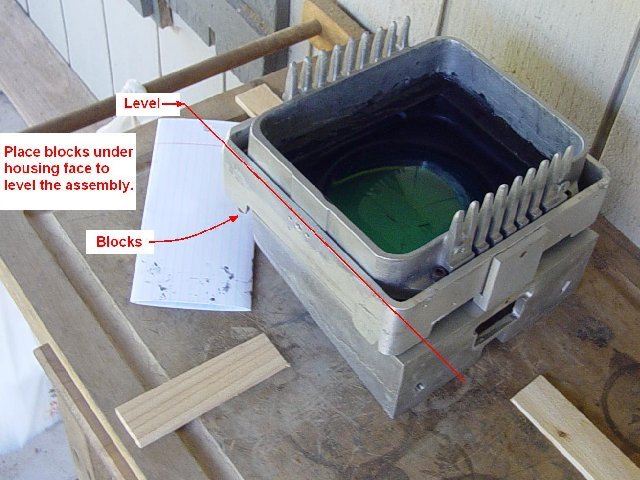
Picture 10.j.
10.k We will now be mounting the tube into the housing. It is important to
make sure the tube is centered during mounting. Any significant tube adjustment
after setting will smear the silicone on the tube face, which will reduce some
useable phosphor area. To help minimize tube adjustment, I glued two of the
shims (ref step 10.d) to the housing. A little dab of silicone on the shims will
hold it in place. (Picture 10.k)
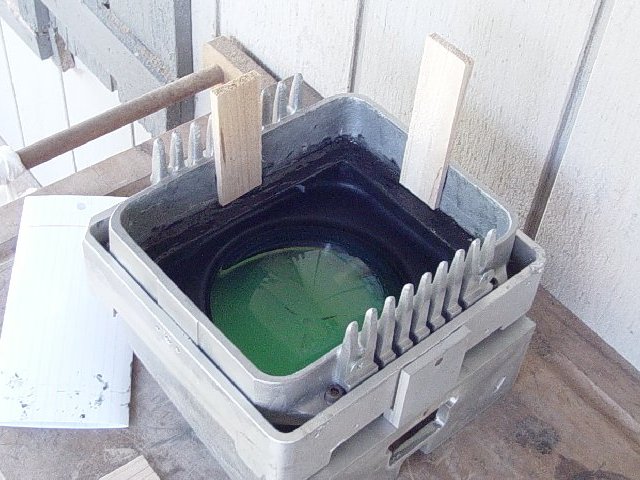
Picture 10.k.
10.L Be sure not to install the tube upside-down. If you install the tube
upside down, you will not be able to connect the cables to the neckboard.
Looking at the neckboard connection, the triangular part of the connection needs
to be down – not up. (Picture 10.L)
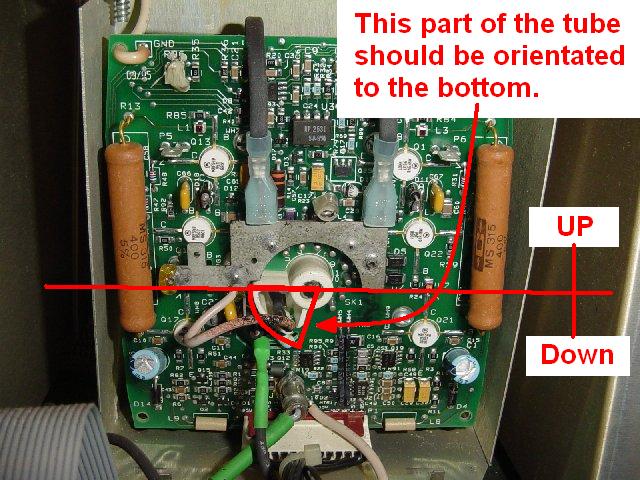
Picture 10.L.
10.m Carefully set the tube down into the housing. Maintain slight pressure
from the tube against the two-glued shims to help ensure the tube is centered
when lowered into the housing. (Picture 10.m) After the tube is completely set
in the housing (and silicone) place the last two shims in place.
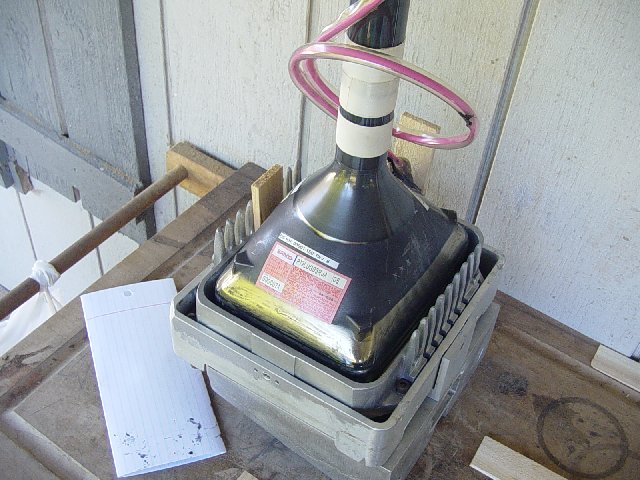
Picture 10.m.
10.n Lightly tap the shims down to lock/wedge the tube in place in the
housing. (Picture 10.n.1) Ensure the tube is centered in the housing. Allow the
tube silicone to cure (approx 1 day) (Picture 10.n.2). Store silicone tube to be
used later.
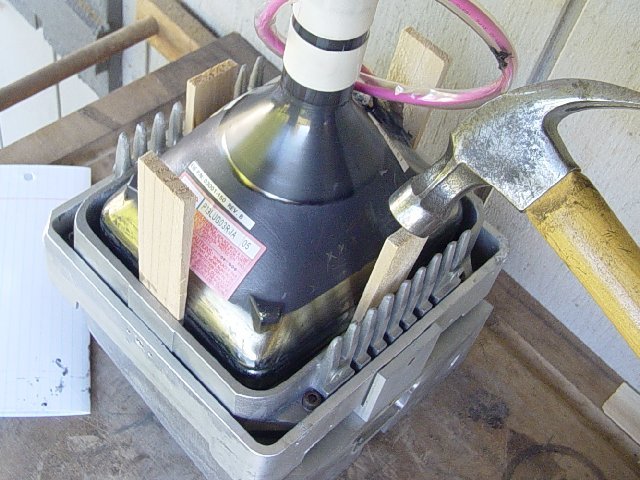
Picture 10.n.1.
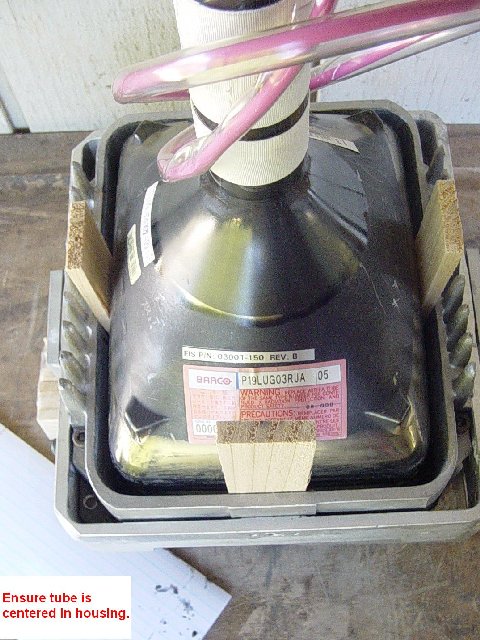
Picture 10.n.2.
10.o After silicone has cured, remove shims, and get silicone tube ready for
continued use. Take a typical drinking straw, cut it to 4-6 inches long, and
tape the drinking straw onto end of the silicone tube nozzle. …Use plenty of
tape. (Picture 10.o)
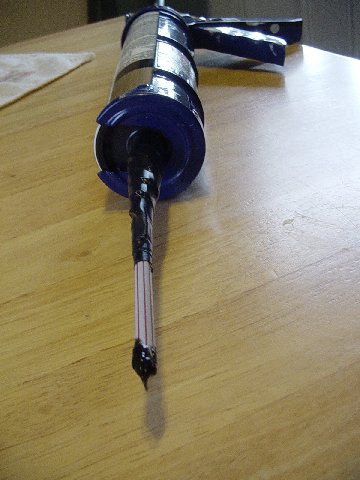
Picture 10.o.
10.p Apply more silicone to the housing to fill the housing/tube gap. To
ensure a complete filling of the gap without air pockets, use the straw to fill
the gap starting at the bottom until the gap is full of silicone.
10.q Apply silicone to the bottom side of the high voltage wire boot and install
on tube. (If applicable)
10.r After complete, allow silicone to cure. (Few days)
11 Filling your new tubes with Glycol:
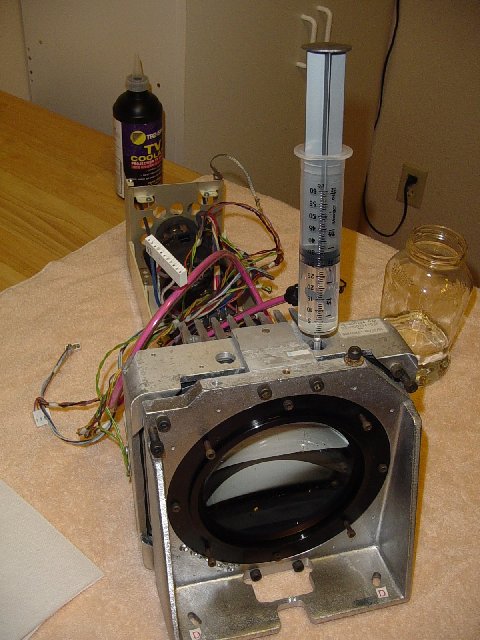
11.a After silicone is cured, remove both fill screws and fill the tube chamber
with glycol coolant. To get the glycol in the very small fill holes, I used a
(very) large syringe that I bought from a veterinary clinic (the vet cares for
large farm animals). The syringe I used was a 2oz syringe with a 14 gauge x
1.5-inch long needle. I used just under 20 oz of glycol per tube. When finished
install both fill screws. (Picture 11.a.1, Picture 11.a.2)
Note: It’s recommended to leave a little air in the glycol chamber for fluid
expansion when it heats up, (or when the glycol absorbs water from the air over
the course of a few years). As the glycol heats up and expands - it will apply
pressure on the C-element, tube, and bellows. With enough pressure, a leak or
other damage may occur. The air bubble will allow some room for expansion and
will help against any damaging pressure build-up.
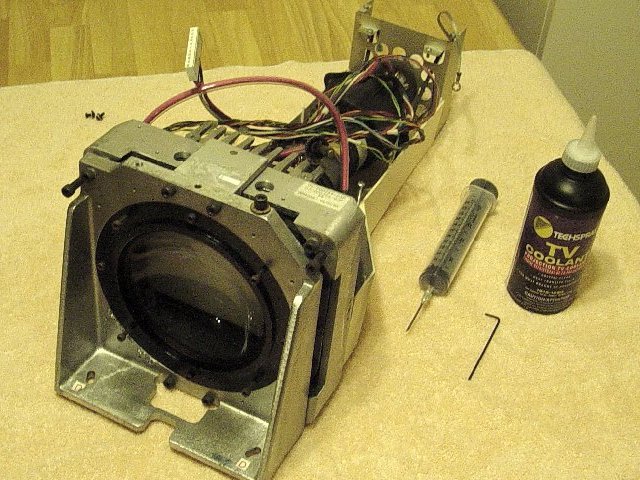
Picture 11.a.1.
Picture 11.a.2.
12. Re-install electronics & reassemble housing:
12.a Re-install ground strap, scan yoke, focus yoke, flare yoke. Ensure the
appropriate yokes (R/G/B) are installed onto the appropriate tube. (Ref note in
step 3.a.) Reassemble tube housing in reverse order. Refer to Tim Martin’s
website for electronics adjustment: www.etechvideo.com
12.b If you are installing tubes other than the original P19LCP style (more
typical for 9” tubes), then make appropriate modifications to your neck boards
before installing (if necessary). Refer to Curt Palme for instructions.
| Did you find this information useful? Please consider making a
donation to help defray the cost of managing and hosting future
articles, tips, and documents. |
|
|
|
Or
purchase
from
Amazon.com
and a small percentage automatically
goes to support this site at no extra cost to you! Visit their
Blu-ray and
4K UHD
stores for sales.
Want to show off your
home theater? See our
Blu-ray Release List & Must-Have Titles. |
|

|
|

|


